Do you want your Minecraft character to stand out and look truly your own? Custom skins are the easiest way to bring your personality into the game. Instead of playing as the same old Steve or Alex, you can design a character that looks exactly how you imagine colorful, fun, and one of a kind.
In this guide you’ll learn how to make custom skins in Minecraft APK step by step, how to upload them into the game, and a few simple tips to make your designs look amazing.
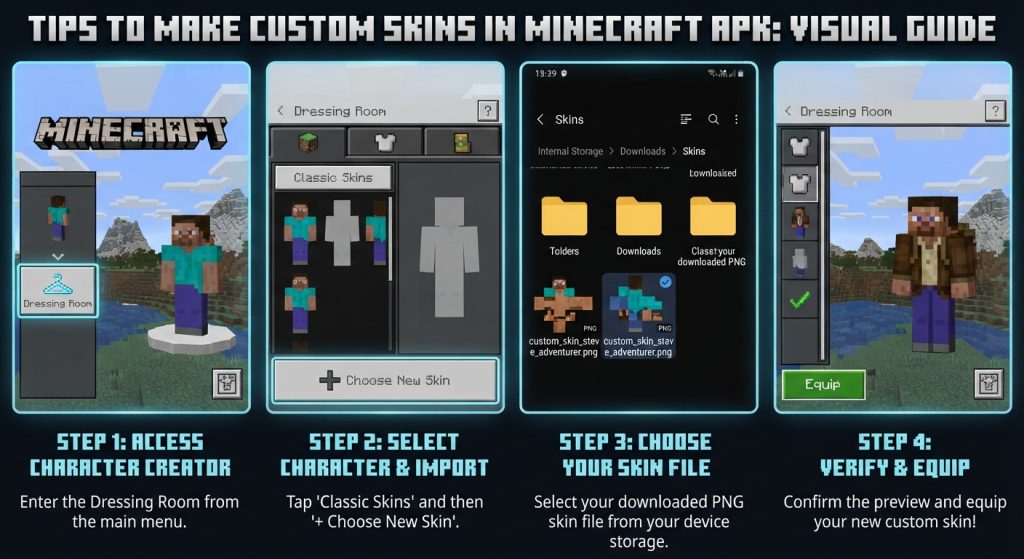
Guide for Creating Custom Skins in Minecraft APK
Making your own skin is easier than you might think. Just follow these four simple steps and you’ll have a fresh new look in no time.
Choose a Skin Editor Tool
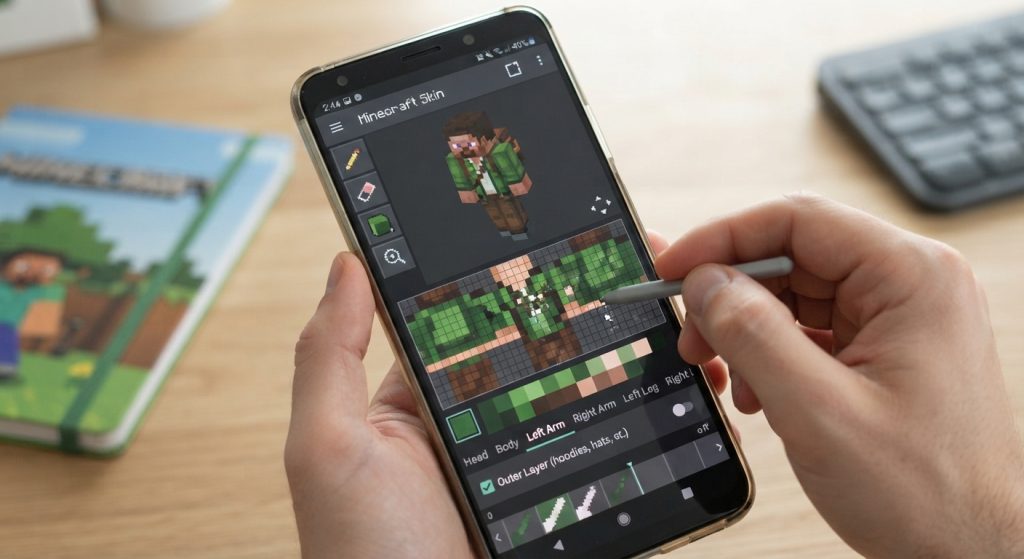
The first thing you need is a good skin editor. There are many easy-to-use apps that work perfectly on Android, such as Skinseed, Skindex, and, NovaSkin. These tools have simple interfaces and plenty of ready-made templates, so you can start designing right away without any special skills.
Start with a Base Skin
You don’t have to build your skin from scratch. Pick a base character like Steve or Alex and use it as your starting point. Starting with a base gives you a ready framework to work on, which makes editing much faster and a lot less confusing for beginners.
Customize with Colors and Patterns
Now comes the fun part. Use the fill, pencil, and gradient tools to add your own colors, shades, and patterns. Try to balance bright and soft colors so your skin looks clean and eye-catching. You can create striped clothing, shaded armor, cool hairstyles, and much more it’s completely up to you.
Save and Export the Skin
Once your design is ready, save it as a PNG file, since that’s the only format Minecraft accepts for skins. Export it straight to your device gallery so it’s easy to find when you upload it into the game.
How Can I Use Custom Skins in Minecraft APK?
After creating your skin, adding it to the game takes just a few taps. Here’s how to do it.
1. Open the Minecraft APK and go to the Profile area from the main menu.
2. Import your custom skin by tapping Edit Character, then the Owned Skins tab, and choosing the Import option. Find your saved PNG file and upload it.
3. Test it in the game to make sure it displays correctly. Jump into a world and check how your new skin looks from every angle.
That’s it your custom character is now ready to explore, build, and play.
Tips for Better Skin Customization
Want your skins to look even better? Keep these simple tips in mind:
Be creative Take inspiration from your favorite characters, movies, or hobbies.
Keep it simple Minecraft has a pixelated style, so clean and clear designs always look best.
Use contrast wisely Pair dark tones with bright accents to make your skin pop.
Experiment with patterns Try stripes, polka dots, or smooth gradients for a unique feel.
Update regularly Switch your skins now and then, or try fun seasonal themes.
Test in the game Always check that your skin looks the way it did in the editor.
Save backup files Keep copies of your skins so you can reuse or edit them later.
Custom skins are one of the best ways to make Minecraft feel truly personal. With a simple editor, a base character, and a little creativity, you can design a skin that shows off your own style. Keep your designs clean, play with colors, and don’t be afraid to experiment.
So open your favorite skin editor, create something amazing, and step into your Minecraft world looking exactly the way you want.